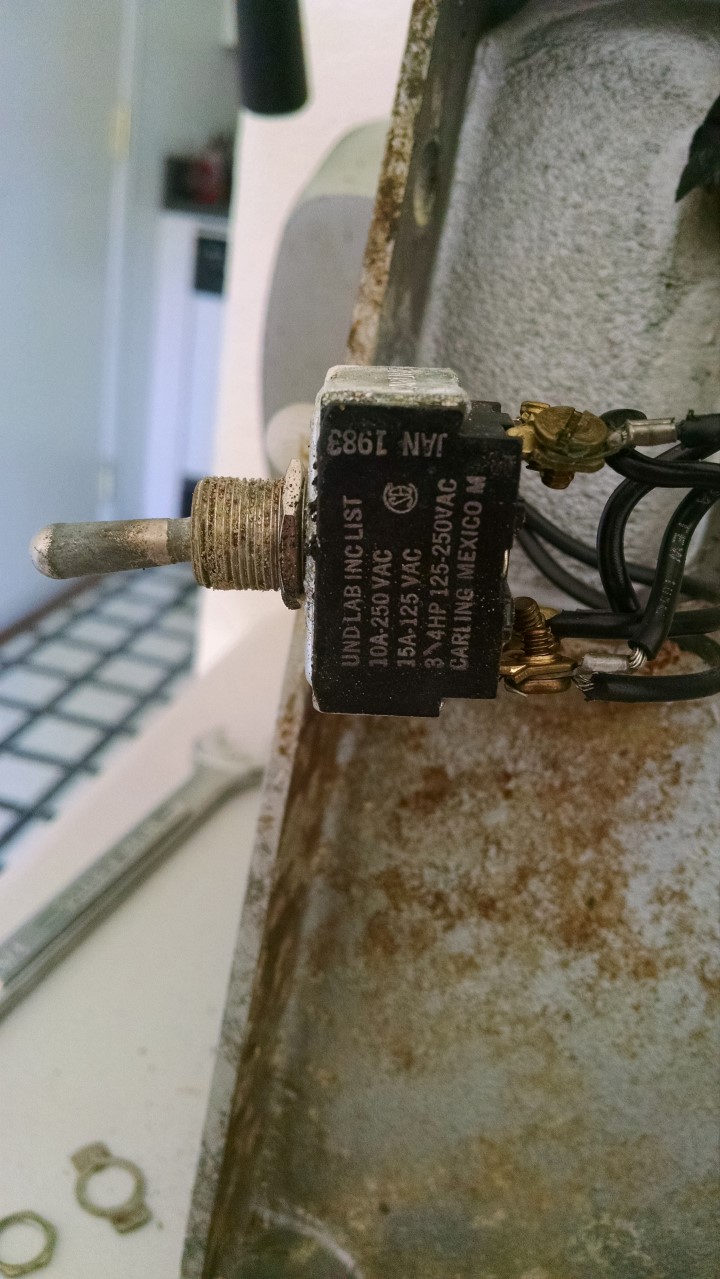
Here is what the power switch looks like:
I replaced the power switch with a new unit. You should be able to find an appropriate replacement unit at any decent electronics store. There was no part number on the switch I got. The switch I got had 2 extra terminals so I had to figure out which way to hook the wires up so that the on/off function would be set properly. If you aren’t sure how it should be hooked up, use a mutlimeter on your existing switch. If your existing switch is so bad off that you can use it as a reference then all you need to know is that the 2 wires coming from the power chord to the switch should be on one side of the switch and not have continuity when the switch is in the off position. The other 4 wires should be on the other side of the switch, 2 on each. One from the light and one from the other side on each pole of the switch.
It is worth noting that Hobart put a cardboard insulator in the unit to protect against the switch/wires shorting to the body of the slicer. This piece is very important. Make sure you put it back in when you put it all back together. I added electrical tape to my replacement switch for extra insurance against a short.